
Making the Kitty Grabs Back Electric Go Kart
If you’ve never seen or heard of Power Racing Series, start here and come back. It looks like crazy fun, right? People take a second-hand kid’s ride-on car (or build one from scratch), turn them into full-on electric go karts, and race each other for fun and glory.
And every year at Maker Faire Bay Area, I’ve watched these racers from the sidelines, laughing and cheering and thinking to myself that someday I might just build and race a car of my own.
Season 8 Power Racing Series Trailer from Power Racing Series on Vimeo.
At the 2016 Maker Faire, freshly unemployed from my year as Make magazine’s Project Editor, I decided there was never going to be a better time to try building my own car.
One year later, I raced my own car at Maker Faire and took two gold medals, a silver, and a bronze. As silly as it sounds, it was a peak experience of my life and here are the steps I took to get there.
1. Research
Before starting in, I wanted to know what I was getting myself into and see how other people had built their cars. This is all easy enough to do online.
First, I recommend checking out the Power Racing Series site, watching some videos and checking out their official rules, which are hilarious.
Second, skim through this Instructable on how Jamie Price built his mini electric Jeep. As someone who couldn’t weld and knew next to nothing about motors and cars and speed controllers — I knew I wasn’t ready to build a car this way on my own. Still, it was an approachable guide and in hindsight my car build ended up resembling this one quite a lot.
Join all the forums. The main Powerwheels Racers for Adults Facebook group is here, and they’re lovely people. There’s also the Modified Power Wheels group, which is more of a general showcase for non-racers and less geeky.
Then there’s the Modified Power Wheels Forum, which is a deep resource that I surprisingly didn’t use much, but covers a lot of territory and is a well organized resource. And finally, the Power Racing Series Wiki (http://ppprs.2xlnetworks.org/), which has a bunch of great info, specific car builds, bill of materials. It’s awesome. I actually wish I’d read more of it, but at some point all the research gets overwhelming.
2. Build something stupid
I know a lot of smart, talented people who refuse to start a project until they are sure they have a solid plan in place. For better or worse, I am not one of these people.
I suggest that you give yourself permission to use whatever skills and resources you have to build a stupid thing the wrong way and watch it fall apart. It’s the best way for you to learn and it results in a tremendous amount of pride and appreciation when you get things right the second time.

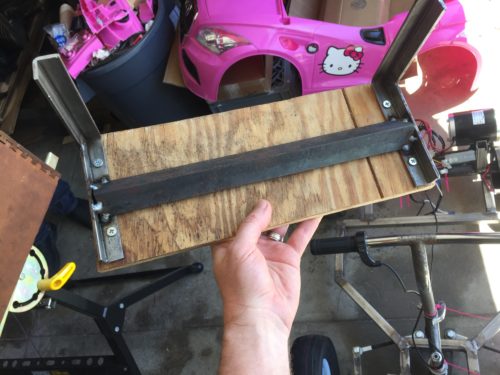
So, find a cheap used ride-on electric car on Craigslist, take it apart, and try to figure out how to make it go faster. I got the Kitty for $20 from a dad who was convinced it was broken. Wiggling a few wires brought it back to life, but at 6v it wasn’t going anywhere fast.

Here’s what my first attempt looked like. I kid you not — it’s made out of wood and electric scooter parts. And it actually works well enough that my kid still rides it around. As a racer, though, it’s pitifully underpowered, prone to overheating and breaking down, and there’s not enough torque to support my weight (barely enough even for my 9 year old).

What I learned the hard way by doing this is enough for a whole other blog post. And even if I wrote it, nothing is more educational than failing on your own and coming to terms with your own shortcomings.
More than anything, I realized I needed help and to learn to weld. Lucky for me, my friend Jordan Bunker was also freshly unemployed, owned a MIG welder, and was eager to give me some tips. After a few lessons, pretty soon Jordan was co-building the whole car with me.
3. Design something less stupid
At this point I had experience on how not to build a go kart (which sounds dumb, but is in fact very valuable), I had some competency at welding, and I had someone with more experience to help me. All of this gave me the courage and humility to ask around and see what builds other people recommend emulating.
At a party with Power Racing Series organizer Jim Burke, I cornered the poor bastard and asked his advice. He told me to look at the Marriott Chariot build log from Harrison Krix.

Having done the research, I knew that Harrison’s build wasn’t the most advanced thing out there (for the other extreme, see Charles Guan). It used heavy brushed motors and cheap speed controllers, but it offered a solid design for me to follow and didn’t require much technically beyond my skills.
Best of all, Harrison had shared a Google Spreadsheet bill of materials on the Power Racing Series site with links to most of the materials needed and a breakdown of pricing. By following his list, I could eliminate the guesswork of sourcing parts and staying on budget.
4. Build it
From here, I’m just going to throw a ton photos at you highlighting each stage of the build chronologically. I’ll try to provide commentary where it makes sense. If you have a specific question, email me at donald@makerprojectlab.com and I’ll try to answer it.
Body
Here’s the Kitty’s shell, fully stripped down. The gaffer tape outline on the ground is to help me visualize the outermost border of the design and where the axles sit.

Chassis Frame
More or less copying the chassis layout of the Marriott Chariot, Jordan and I cut out the pieces we’d need from 1″ square steel tubing. Nothing is welded up yet. Cuts are all roughly done with an angle grinder cutting disc.
A tip on buying steel tubing — avoid Home Depot at all cost. They will charge you 2-3 times what you’ll find from a local steel supplier. I used ALCO Iron and Metal in nearby San Leandro. They were very affordable and happy to cut the stock down to a size I could fit in my car.
Also here you see the steering spindles for the front wheels. I ordered these up on eBay and they worked great.

Here we are in Jordan’s shop cutting angles into the stock so everything fits together for welding.


Rear Axle
With the basic outline of the chassis welded up, it’s time to think about the rear axle, wheels, and motor placement. In the shot below I’m just putting the rough ingredients together and thinking things through. The axle tube was also acquired from my local steel supplier. The inner diameter of the tube was larger than I needed for the 5/8″ threaded rod I was running through it, so we just ended up welding the rod right into the axle. It worked fine.

Wheels
The wheels were a whole other ordeal. To keep things under budget, I figured I’d strip down some 10″ Harbor Freight tires, keeping only the metal shells and tubes and fitting new bearings into the hubs and go kart slicks over the top. It wound up being far more trouble than it was worth and a critical failure point once I got these onto the race track.
These photos show the painful and dumb transformation process, but do yourself a favor and grab some solid rims and wheel hubs from BMI Karts instead.


To get the drive sprocket to fit this particular double-flange hub I had to drill out the existing holes for enough slop to get things to fit. Ideally I would have done this on a drill press, but I was impatient and used a step bit and an electric drill instead. Surprisingly, it held together fine during the race and the chains held on.

Here’s the brake drum fit onto the same left drive hub. Taking my cue from the Marriott Chariot, I only used a brake on one side. We chose the left side after looking at the track configuration and realizing it’s mostly made of left turns. In hindsight, a second brake (or better brake) would have helped. My stopping power was fairly poor.


Now for the front wheels, which were doomed to fail spectacularly.


Welding in the back axle.

Motor Mounts
Some extra angle iron added for mounting the motors in alignment with the wheel sprockets. In hindsight, if we had planned the placement of the square tubing better we wouldn’t have needed the angle iron to extend it out — but it worked fine.

Holes drilled for the motor mounts, all with a little slop built in so we could make small adjustments to how the motor sits if needed. Also, only three of the four mounting points are used for each motor. We could have welded in another bar, but three points were enough to get the job done.


Front Steering Spindles
Now to consider how the front wheels attach. Try to get this as level as possible so all the wheels are touching the ground. Also, we later realized that having the steering spindles at right angles was a mistake that created a terrifying amount of wobble at high speed.
After getting some advice from the Power Racing for Adults group (specifically Michael Jaymes Cox), we later cut these off and reattached them with a .25 deg toe out, 9-15 deg of caster, -0.5 to -3 deg of camber (look it up, I had to). The science of this still baffles me, but it fixed things right up.


Motors & Chains
With the wheels on, we moved on to bolting the motors down and getting chains on.


Steering
Now we had to figure out how to steer the thing. I had a weirdo little bike I found as a curbside freebie in my neighborhood that I happily chopped for its steering column. For the actual pitman arm that the steering linkages attach to, Jordan welded two sections of angle iron into a V shape and drilled out a few sets of holes for us to see what worked best. The further out, the better, it seems.


Power
We’re feeling pretty close at this point but still need to account for power, braking, and adding the speed controllers that mediate between the throttle, power, and motors.
First up, power, which is particularly tricky because we’re using 4 LiPO battery cells pulled from a Nissan Leaf. Wired in series, these batteries give us around 28 volts of power, but more importantly they can last all day without a recharge. This becomes an advantage when other racers running sealed lead-acid batteries have to pit their cars for a battery swap.
You can grab these batteries on eBay for around $60 a cell. I got mine from a seller on the Powerwheels Racers for Adults Facebook group (yet another reason to join the group). I spent about what I would have on eBay, but I got the indispensable bonus of having someone I could ping on Facebook with any questions on wiring, charging, etc. I had many, many questions.


Test Drive
Wheel’s down for the first test drive. Note that we hadn’t installed a brake yet. We drove slow, but having a working brake would have been a better idea.


Brakes
To attach the brake cable to the drum brake, Jordan welded a hex nut and washer to the frame so that the cable had a spot to push against. We zip tied the brake line around the outside of the frame, with a little wiggle room for steering.

Wiring
It was fairly simple to wire up the batteries to provide power to the car using metal strips to bridge connections from stacked batteries and a length of thick 6-gauge wire. Wiring up all the individual cells for the charging harness, however, was a real mess. Jordan later wrangled all these smaller wires, made them a uniform length, and wrapped them up in spiral cable wrap.


Bumpers
Power racing rules dictate that we have sturdy front and rear bumpers. We welded on some angle iron and wrapped them in pool noodles. The bars out to the front bumper also included two bolts welded upright that slot into the Kitty’s plastic body to hold it in place.


Seat
For the seat, we wanted something that could quickly come off for car repairs. This design slots right in and held up well. I later covered the top in memory foam from an old pillow and fake fur. Arms were added to the seat that attach to the body, so that the seat and body all come off as one piece (Jordan’s idea, and a brilliant one).


Wheel Wells
Finally, to prevent the front wheels from rubbing against the body when turning, I had to trim out a substantial amount of plastic from the wheel well. A combination of hacksaw and Dremel with a plastic cutting bit made this relatively painless (though plastic dust went everywhere).

Steering Geometry
After a few terrifying test drives, we realized we had to throw some science at the steering system in order to eliminate the speed wobble. Using specifically Michael Jaymes Cox’s recommended formula of .25 deg toe out, 9-15 deg of caster, -0.5 to -3 deg of camber we were able to fix things up. Jordan cut the angles into blocks and we used those as guides to weld the spindles back on.


Battery Brackets
One last technical requirement to address was securing the battery pack to the chassis. We did this with a series of bolted L-brackets.

We ride to Valhalla!

5. Race it
Power Racing Series takes place year round across the US. The season kicks off in May at Maker Faire Bay Area, but then moves on to Kansas City, Chicago, Detroit, Milwaukee, New York, Pittsburgh, Nashville, and Orlando. There’s bound to be one near you. Each one has a Maker Faire associated with it.

To enter the race, sign up as Maker for the Maker Faire you want to race at by finding the Faire’s specific web page and filling out the Call For Makers online form. On the form, make it clear you’re bringing a car to race, and they’l be sure to locate you in the pits with the other racers.
You also need to register your car and team with Power Racing Series. Go to the site, create an account, and pick a unique number for your car.
That’s it. Assuming you get accepted, Maker Faire organizers and Power Racing Series organizers will contact you. It also helps to let them know you’re coming on the Powerwheels Racers for Adults Facebook group.
Be safe, and good luck!

RECENT POSTS
-
June 19, 2026
![Random Fun [Maker Update]](https://i0.wp.com/www.makerprojectlab.com/wp-content/uploads/2026/06/mu488-thumb_1920x1080.jpg?resize=150%2C150&ssl=1)
Random Fun [Maker Update]
This week on Maker Update: games made just for you...
-
June 11, 2026
![Making Friends [Maker Update]](https://i0.wp.com/www.makerprojectlab.com/wp-content/uploads/2026/06/mu487-thumb_19201080.jpg?resize=150%2C150&ssl=1)
Making Friends [Maker Update]
This week on Maker Update, a plasma-brained pet ro...
-
June 6, 2026

Escapa de La Tomatina (Pico-8 Game)
For the past two weeks I’ve been dabbling in...
-
June 4, 2026
![Dialing for Directions [Maker Update]](https://i0.wp.com/www.makerprojectlab.com/wp-content/uploads/2026/06/mu486-thumb_19201080.jpg?resize=150%2C150&ssl=1)
Dialing for Directions [Maker Update]
This week on Maker Update: antique GPS, a burly ch...
-
May 21, 2026
![Troll Roll [Maker Update]](https://i0.wp.com/www.makerprojectlab.com/wp-content/uploads/2026/05/mu484-thumb_19201080.jpg?resize=150%2C150&ssl=1)
Troll Roll [Maker Update]
This week on Maker Update: rollin’ with Labubu, ...
Submit a comment